Introduction
The Accessibility Checker is a powerful tool within Canvas’ Rich Content Editor that allows you to run a quick accessibility test on content you have created within the Editor, including text, images, and hyperlinks. Anywhere the Rich Content Editor is found — when you are creating a Canvas content page, an Assignment prompt, a Discussion prompt, or the like — the Accessibility Checker will appear in the toolbar, normally at the far right. With this tool, you can catch common errors that make Web content difficult to access for users with disabilities, and you can easily correct those errors as well before you save and publish your content. Once you have entered content into the Rich Content Editor, just click the Accessibility Checker icon to receive instant feedback.
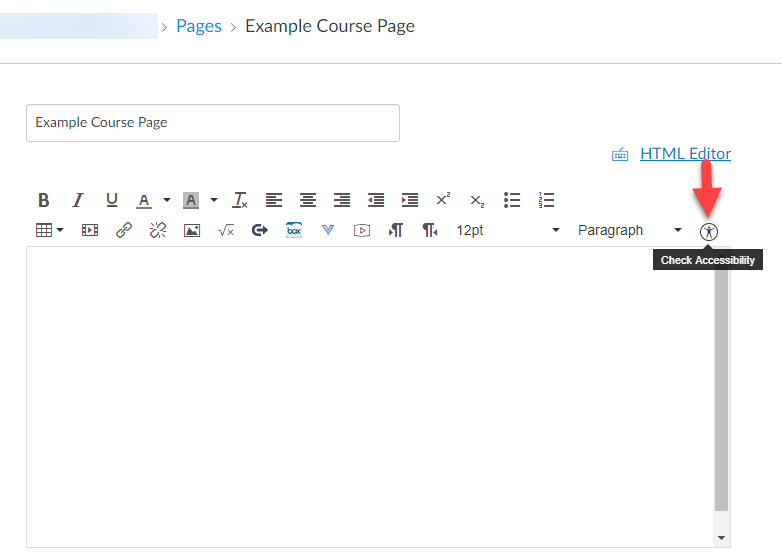
The Accessibility Checker icon, shown here within the context of creating a new Canvas content page
Example 1: Creating Accessible Text
Text that is too small, too light, or of a color that does not contrast well with its background may be difficult to read for users with visual impairments. The Accessibility Checker can detect these problems and give you a chance to correct them.
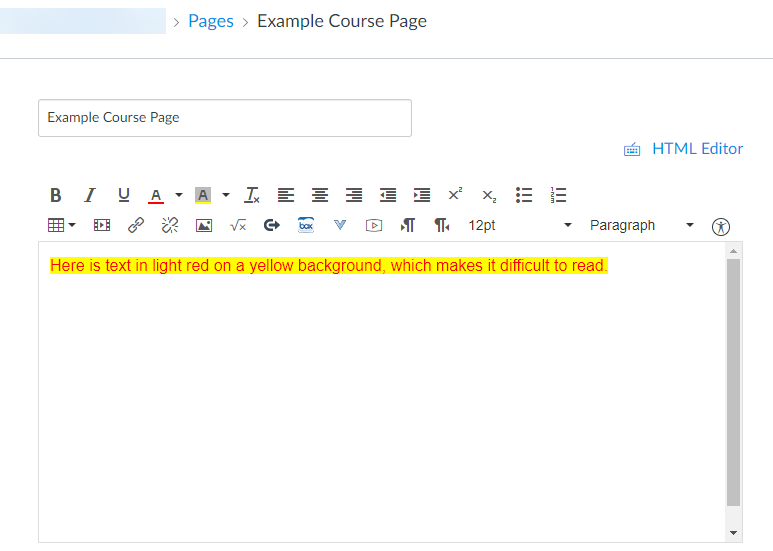
In this example, the user has chosen light red text against a yellow background. The low level of contrast makes reading difficult.
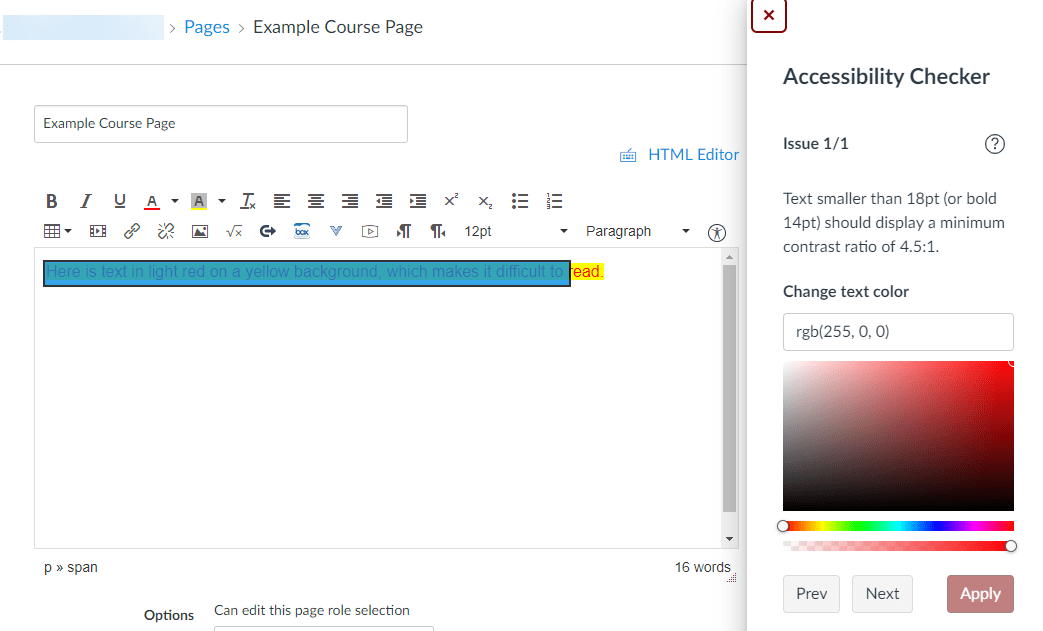
When the Accessibility Checker icon is clicked, a dialog box appears warning the user that the contrast between text and background is too low. A color picker is provided for the user to change the text color to something with better contrast.
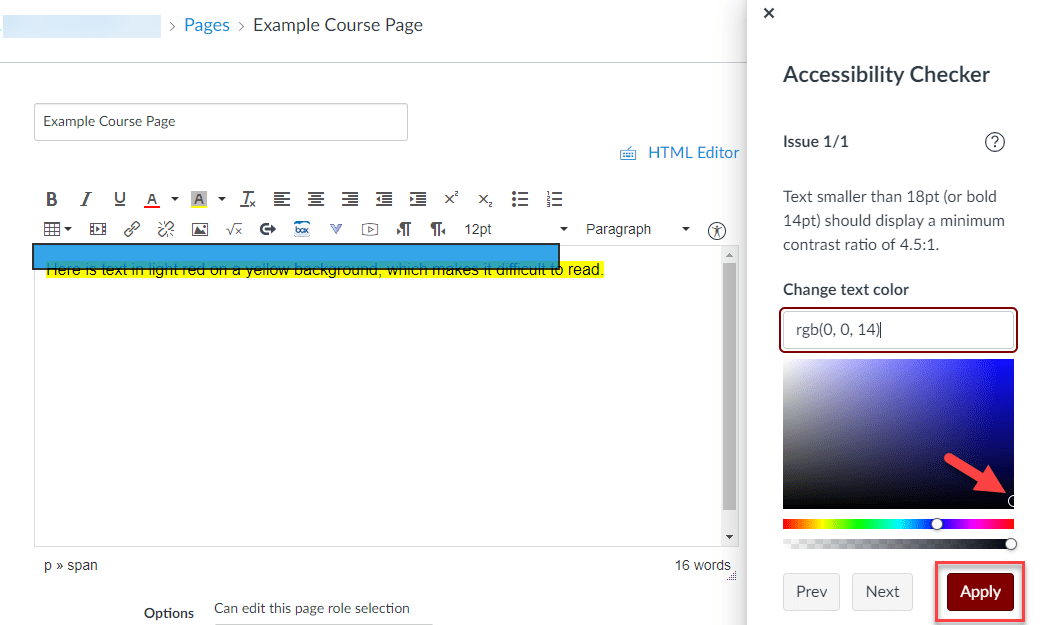
The user can now select dark text in the color picker and click the Apply button to apply it to the text in the Rich Content Editor.
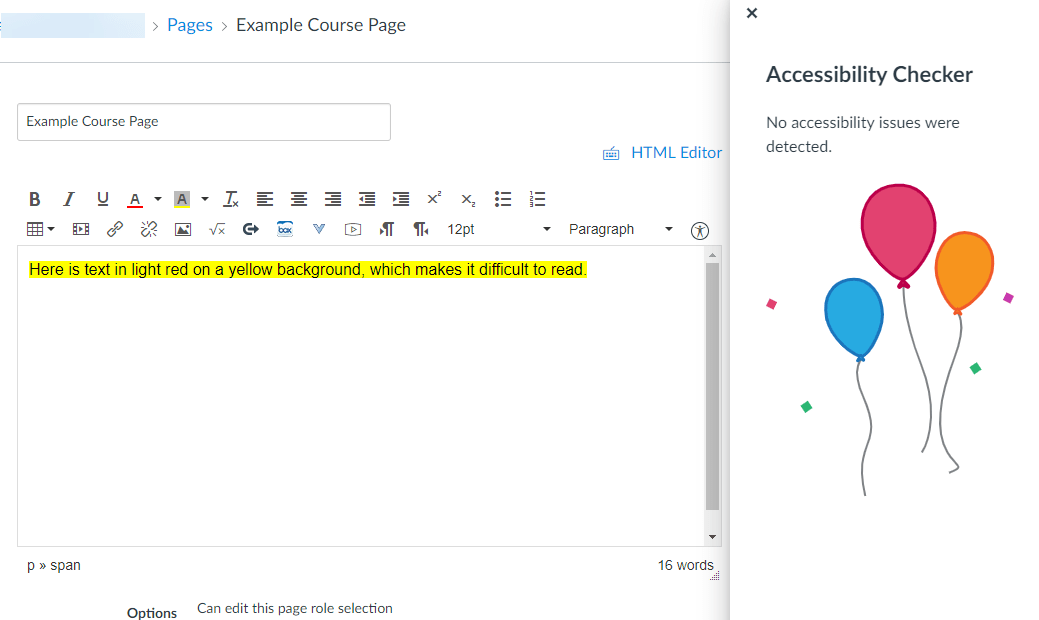
The Accessibility Checker now informs the user that the accessibility issue has been fixed.
Example 2: Creating an Accessible Table
To be accessible for users with screen-readers, all tables should have a caption that describes their contents, and a row or column that is designated as the table header for the screen-reader to identify. If you create a table using the Table tool in the Rich Content Editor that lacks these attributes and then click the Accessibility Checker icon, it will warn you.
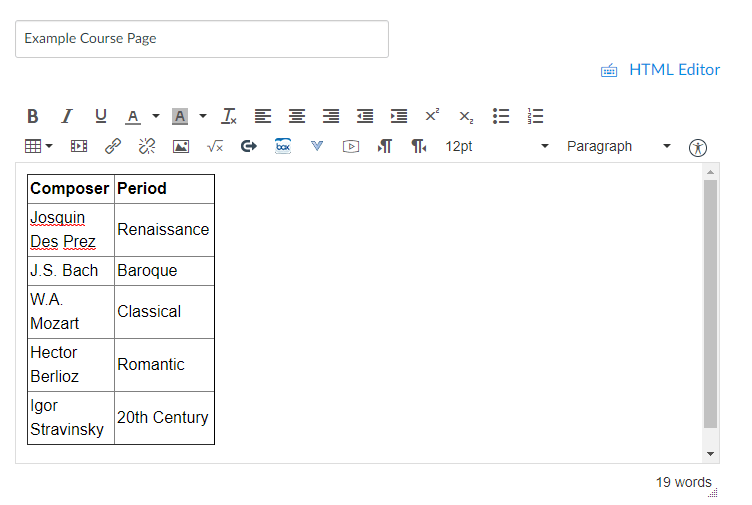
This table has no descriptive caption and no designated header row.
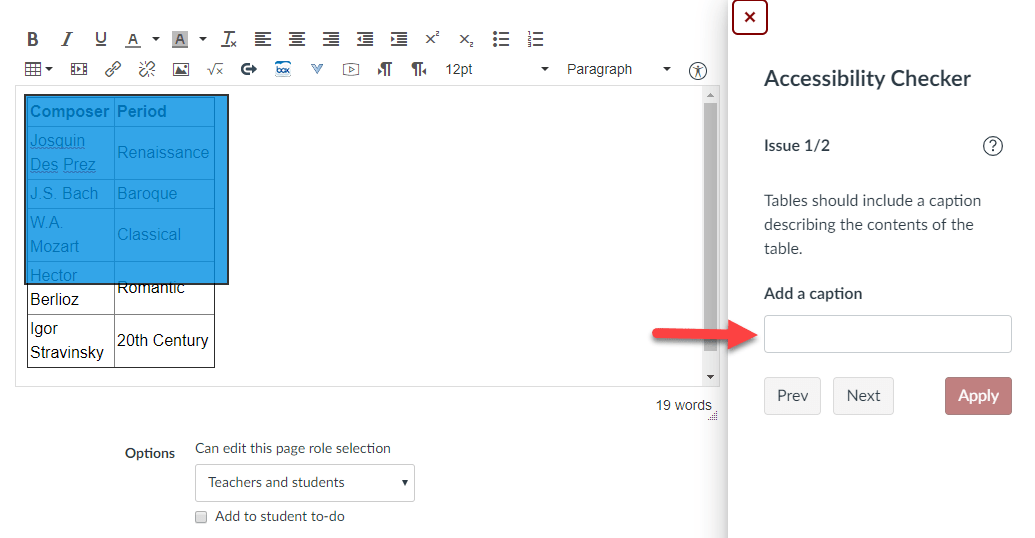
When the Accessibility Checker encounters more than one issue, it will address them one at a time. Here, it begins by asking you to add a caption to the table.
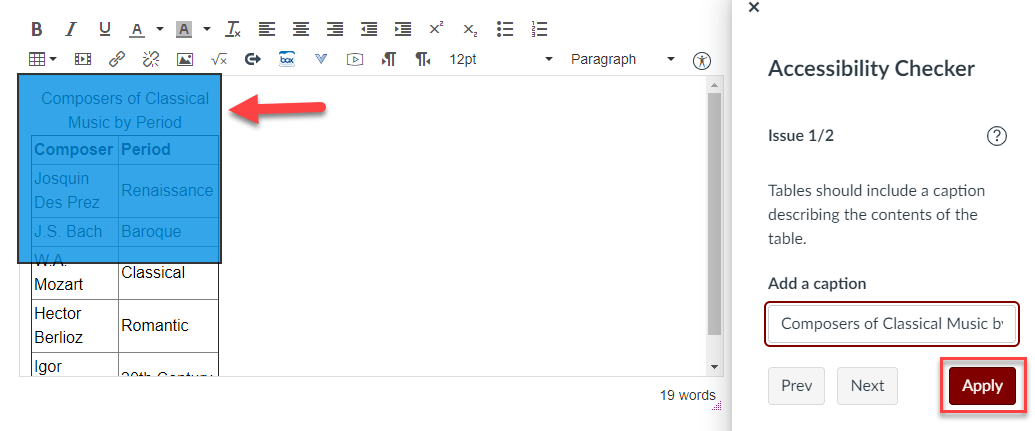
When you enter the caption and click Apply, it is automatically added to the table.
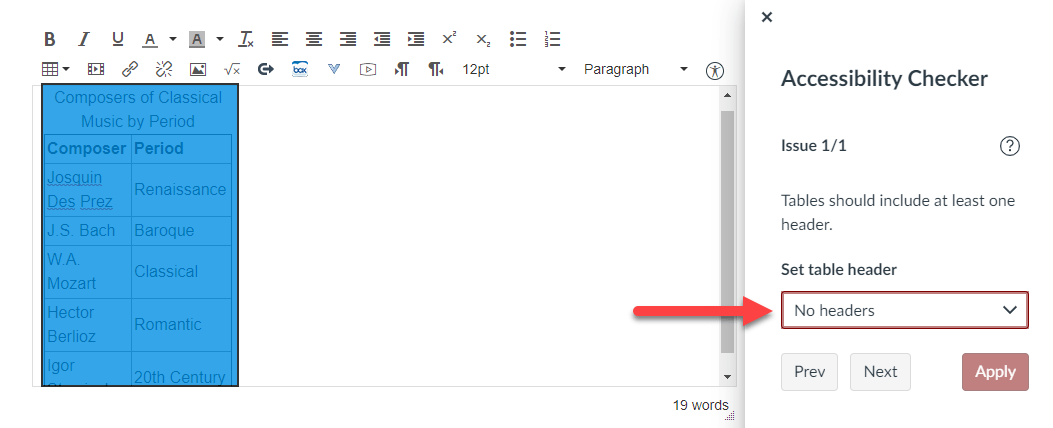
The next issue is the lack of a table header.
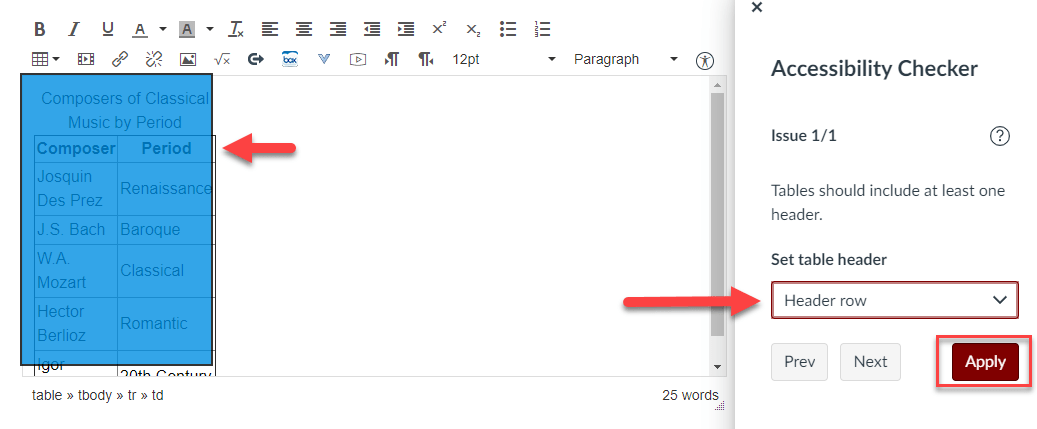
Here, we choose Header row from the drop-down menu and click Apply. This designates the top row (“Composer” and “Period”) as the header for the columns of the table.
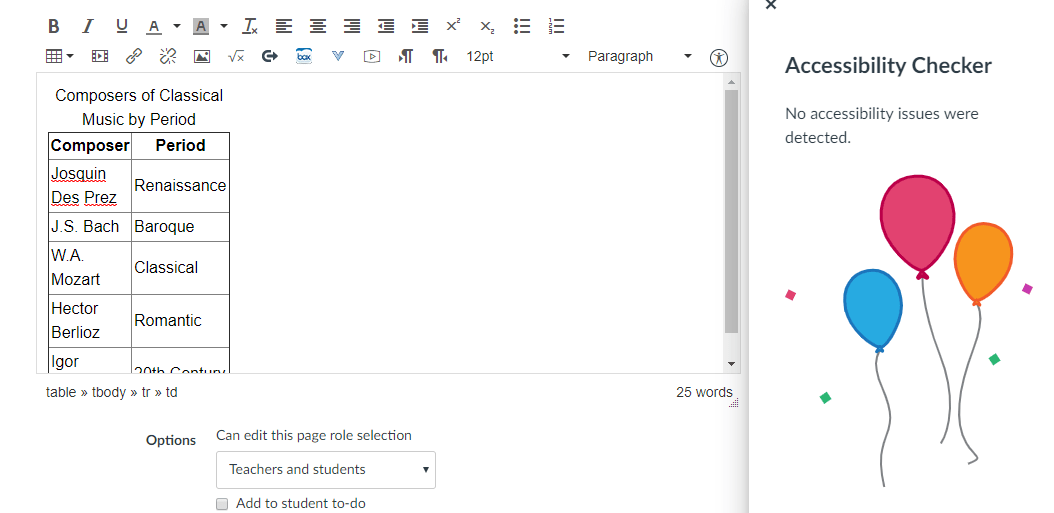
All issues are now cleared.
Example #3: Accessible Images
Images uploaded using the Rich Content Editor should have alternative text (alt text) describing their content for use by screen readers, unless they are specifically designated as decorative. The Accessibility Checker will flag pictures that lack alt text, but in fact Canvas’ image uploader is designed to prevent you from uploading pictures that lack alt text in the first place, even without the use of the Checker.
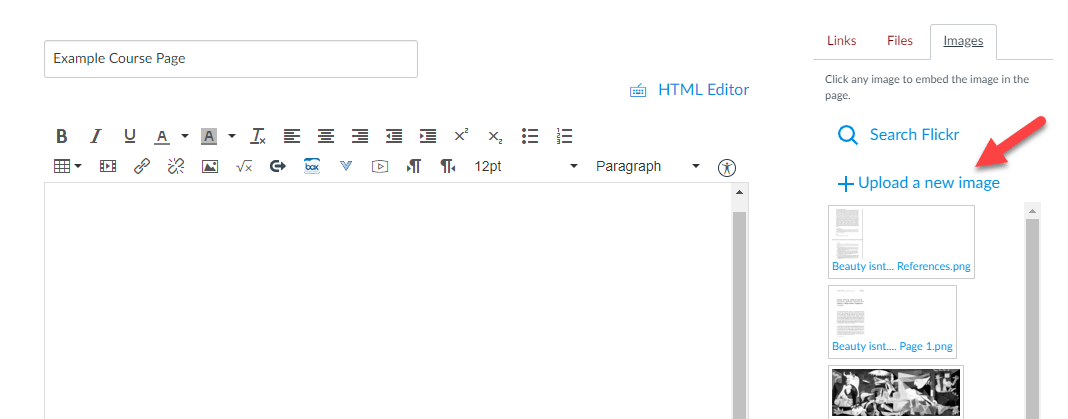
In this example, a user attempts to upload a new image to embed in the content page.
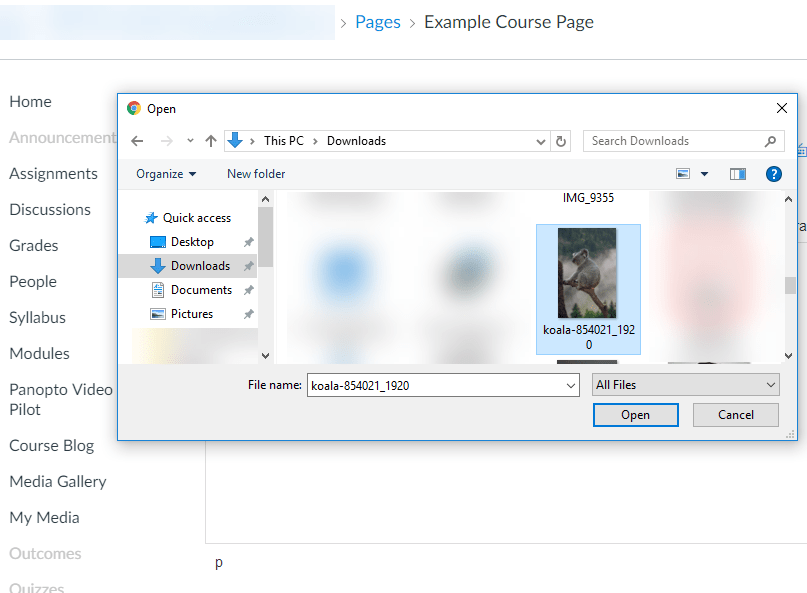
The user selects an image that has no alt text associated with it.
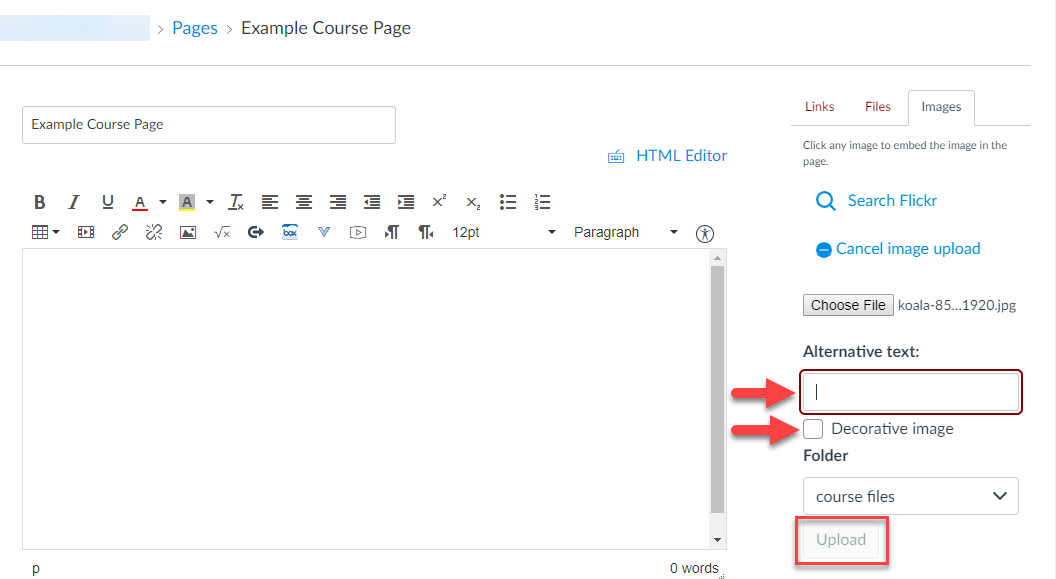
Before embedding the image, Canvas’ image uploader requires the user either to enter alt text or to mark the image as “decorative”. Until the user does so, the Upload button is disabled.
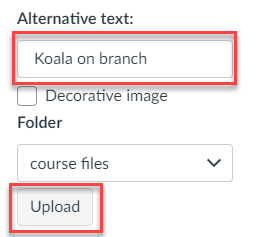
Once the user enters alt text or marks the image as “decorative,” the Upload button is enabled.
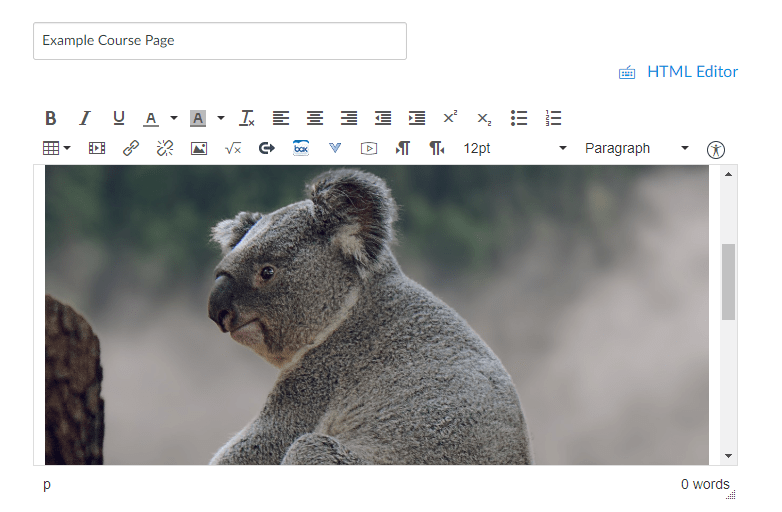
The image can now be embedded.
